
After much time and effort, you’re finally done writing your book 一 congratulations! Now it’s time to make it available for your audience to buy, starting with publishing it on Amazon.
Here’s a step-by-step guide to help you confidently publish a book on Amazon.
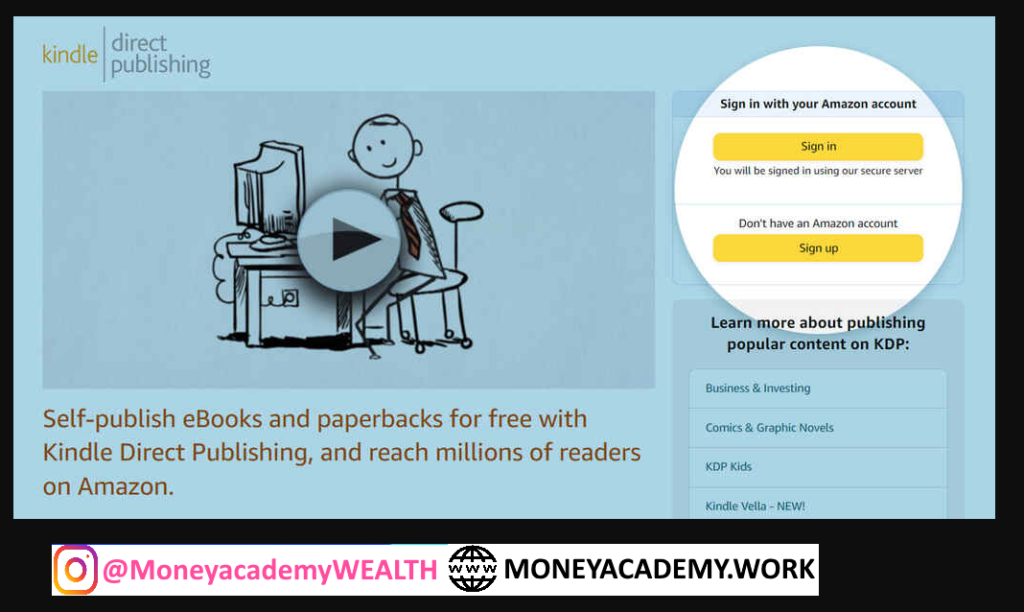
1. Start an account on Kindle Direct Publishing (KDP)
The first step is to set up a KDP account, which is quick, free, and easy. Hop over to Kindle Direct Publishing and either sign in with your existing Amazon account or sign up for one.
Once you’re logged in, you will notice a message at the top saying that your account is incomplete 一 before you can upload your book, you’ll need to tell Amazon how to fulfill your payments.

Click on Update now and fill in the following information:
- Business Type, Date of Birth, and Country: tick off ‘Individual’ or ‘Corporation’ depending on whether you’re publishing as an author or a company, then select your birth date and country of residence.
- Payment information: insert your bank account details for receiving your sweet, sweet royalties from sales across all Amazon marketplaces. For American accounts, you’ll need to provide the account holder name, number, and routing number 一 the first nine digits on the bottom of your checks.
- Tax information: complete the quick tax interview to establish your tax identity.
Once you’ve provided all the information, click “Save” and then “Bookshelf” from the top menu to start the process of publishing your book.

You’ll be asked whether you want to publish a Kindle ebook, paperback, hardcover, or a Series page. This guide will focus on the ebook format, though the process including Print-on-Demand services is pretty similar.
Next, it’s time to customize your book page to make sure Amazon customers will be persuaded to hit “Buy now” when they land on it.
2. Create a new title and enter your book description
The KDP dashboard is divided into three sections: Details, Content, and Pricing, which we’ll cover one by one.
As a first step, you’ll be asked to provide the following information:
- The language of your book;
- Your book title and/or subtitle;
- Whether it’s part of a series;
- Whether it’s a new edition of an existing book;
- Your author name (pen names allowed);
- The names of other contributors (e.g. a book illustrator, or the editor if it’s an anthology)

Right after, you’ll need to provide a product description 一 a blurb similar to those on the back of a book. There’s an art to writing a compelling book description, so take your time with it and refine it to the last detail.
Pro-tip: Want to write a book description that sells? Download this free book description template to get a headstart.
Most importantly, make sure your first line is intriguing, since Amazon only shows an abbreviated preview of your blurb, relying on readers to click “Read more” to expand it. Take advantage of Amazon’s bold, italic, and bullet list options to make your description is visually appealing — but don’t go overboard, of course.
Now that your book is ready to stand out, it’s time to position it on the right shelfs of Amazon’s bookshop.
3. Select your keywords and Amazon categories
Keywords and categories are crucial for boosting your book’s chances of success, since they help you ensure that your book is found by the right readers, depending on what they search for. KDP lets you select two categories and up to seven keywords for your book. Select the ones that best describe your book — and remember, you can make changes later, so don’t be afraid to experiment.

As a rule of thumb, you should pick one broad category, like Travel, and a niche one, like Hikes & Walks. In terms of keywords, pick some that are highly related to the content of your book and aren’t already mentioned in its title or description. Finally, you can also select an age and grade range to better identify your audience 一 especially if you’re writing children’s books.
Before moving on to the next section, you’ll be asked if your book is ready for sale or if you wish to make it available for pre-order at a particular date. Once that’s cleared out, it’s time to upload the actual book files.
4. Upload your EPUB and book cover files
In the next tab, you’ll need to upload your book file onto your KDP account. Simply click the friendly yellow “Upload eBook manuscript” button, select the final copy of your EPUB file, and click “OK.”

Amazon will accept a range of file formats, but they strongly recommend having your file formatted as an EPUB, which will also give you better control over what it looks like on Kindle. Slapping a Word document in and trusting Amazon to do the rest never works out well.
Make sure your formatting is up to standard
Readers can tell who’s professionally formatted their book, and who hasn’t — and cutting corners will come back to bite you. Hiring a typesetter will definitely pay for itself over time, but if you’re on a tight budget, you can use the Reedsy Book Editor to format and export a beautiful ebook for free.
Once you’ve selected your manuscript, you’ll see a message saying it’s processing your book. Do not refresh or click off of this page! Amazon can take a few minutes to upload your book and verify it.
After formatting your book to Amazon’s satisfaction, you’ll see a little green message saying that your manuscript has been uploaded successfully. Take a moment to celebrate, but don’t get too distracted — there are still a few very important steps to go.
Upload an enticing book cover
A book won’t sell without an attractive cover. Your cover designer should have provided you with a JPG or TIFF version of your front cover, sized to Kindle’s suggested resolution of 1,000 x 625px. To add it, simply select the option to use a pre-existing cover, and click “Upload your cover file”.
Like when you upload the book, this process can take a minute. When it’s done, you’ll get another green notification.

After you’ve uploaded the content and cover, you can use the “Ebook Preview” tool to see how it will look page by page. Take a minute to ensure that everything is correct: that the whole cover shows up, that the interior looks the way it does on your computer, etc. 一 if anything is wrong, double-check your files, then upload again.
At the end of this section, you’ll be asked if you have an ISBN number, and who you want to list as “Publisher.” Both pieces of information are optional but worth paying attention to. To upload your ebook, you don’t need an ISBN barcode, Amazon will assign one to your book for free. Nevertheless, we recommend you always buy your own ISBN if you can afford it since you can register your name as the publisher and retain ownership in case you want to “go wide” and publish on other retailers in the future.
🤔
5. Set a price between $2.99 and $9.99
The first thing to know about pricing your book is that Amazon offers a 70% royalty rate on ebooks priced between $2.99 and $9.99, and 35% on anything outside that range.

There will be times when you want to sell a book outside this price range. Perhaps you will sell the first in a series at a lower price to drive sales for the rest of the books. But as a general rule, it’s best to stick to something that will get you that sweet 70%.
As you set your price, Amazon calculates your estimated royalties. It deducts a small “delivery rate” based on the file size of your book and then shows you how much money you’ll make per sale.
You can also expand the pricing section to set different prices for each country you want to sell in. If you genuinely don’t care about international sales, you can just set it to auto, but you’ll get much better results if you do it manually. Selling internationally can really help boost your sales, so we recommend keeping an eye on your international sales trends and nurturing those that develop.
Our free course can tell you all you need to know about international pricing ⬇️
Free course: International book pricing
Selling your book in multiple countries? Maximize your international profits with this 10-day online course. Get started now.
You’ll be asked a few other important questions in this section, starting with whether you want to enroll in KDP Select, a program that may help your book reach a wider audience on Amazon.
Decide whether you’ll enroll in KDP Select

To decide, assess the pros and cons of KDP Select: on one hand, it will help you market your ebook through special promotions, on the other hand you’ll renounce exposure to a significant share of the international ebook market.
For example, is selling box sets through Apple Books or Google Play a big part of your marketing strategy? Or do you want to take advantage of regular price promotions on the platform (and even the occasional “free” weekend for your book)? Whether you choose to enroll will depend on your goals as an author and what kind of business plan you have for your work.✅
6. Publish your book
This is the moment you’ve been waiting for! Before rushing in, take a moment to click back through the previous tabs and ensure everything is set up exactly the way you want it 一 you can do that by clicking “Back to Content” on the left.

Although you can correct a mistake after you’ve published, it’s better to ensure the information is right before you hit that button. If you’re not quite ready, a “Save as Draft” button will allow you to come back and finish later. If everything looks good, there’s nothing left to do but hit “Publish your Kindle ebook”.
Congratulations, you did it! As you see, publishing a book on Amazon isn’t nearly as scary as it seems. Your book will appear on Amazon bookshelves soon 一 it may take up to 72 hours forAmazon.com, and up to five days for country-specific Amazon sites. Now you can focus all your energy on publicity and marketing.
If you want to go deeper into KDP best practices and Amazon algorithms, check out the rest of this guide — next up, we’ll be looking at Amazon’s Algorithms.
RELATED POSTS
View all

Top 10 Payment Gateways Around The World moneyacademy.work
December 9, 2022 | by MONEY ACADEMY
Step-by-Step: How to Get Started with Amazon Associates and Short Video Marketing
April 4, 2023 | by khalidaitghiourat